DIY Living Room Decor Ideas: Make It Yourself
A beginner’s guide to decorating with confidence, creativity, and a budget that actually works for you.
You know that feeling when you scroll past a gorgeous living room online and think, “why can’t mine look like that?” Here’s the honest truth — it can. The difference between a room that feels put-together and one that doesn’t is rarely money. It’s intention. When you start working with what you already have and layer in a few thoughtful, handmade pieces, the result surprises even you.
If you’re in a small apartment, splitting a place with roommates, or just not ready to spend a fortune on furniture, you’re exactly who this guide is for. DIY living room decor isn’t about being crafty for the sake of it. It’s about making decisions that feel personal and deliberate — and having full control over the outcome.
By the time you finish reading, you’ll have a clear picture of how to approach your space, which projects to try first, and what to stop doing that might be holding the room back. Whether you want to create your own wall art or rethink how your furniture is arranged, this guide walks you through it one step at a time.
Quick Summary
| Who This Is For Budget-conscious decorators, DIY enthusiasts, and first-time homeowners looking for real, beginner-friendly advice. | Time to Read8 minutes | Top 3 TakeawaysStart with a planFocus on one change at a timeTrust the process |
Quick Summary
WHO THIS IS FOR
Budget-conscious decorators, DIY enthusiasts, and first-time homeowners looking for real, beginner-friendly advice.
TIME TO READ
8 min
TOP 3 TAKAWAYS
1. The Less-Is-More Philosophy
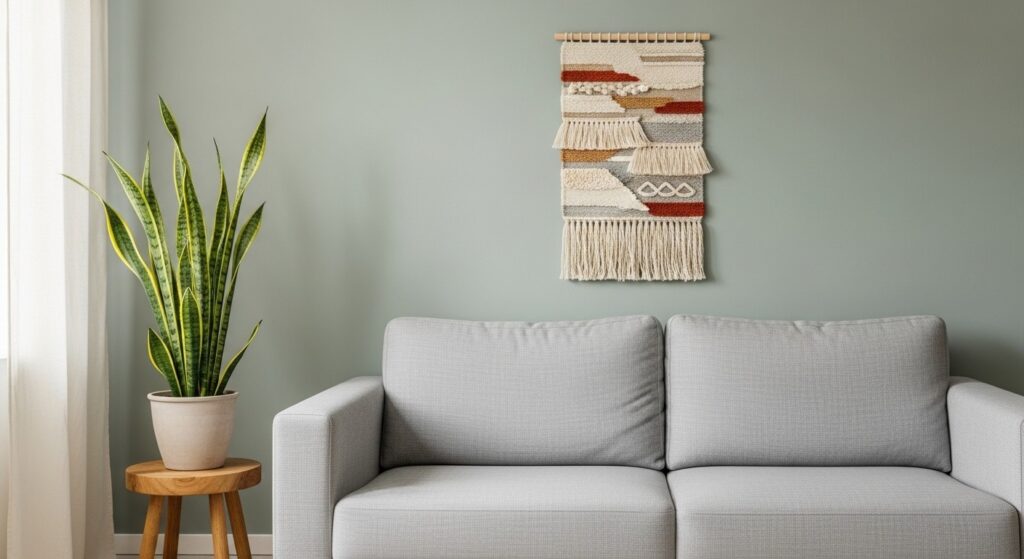
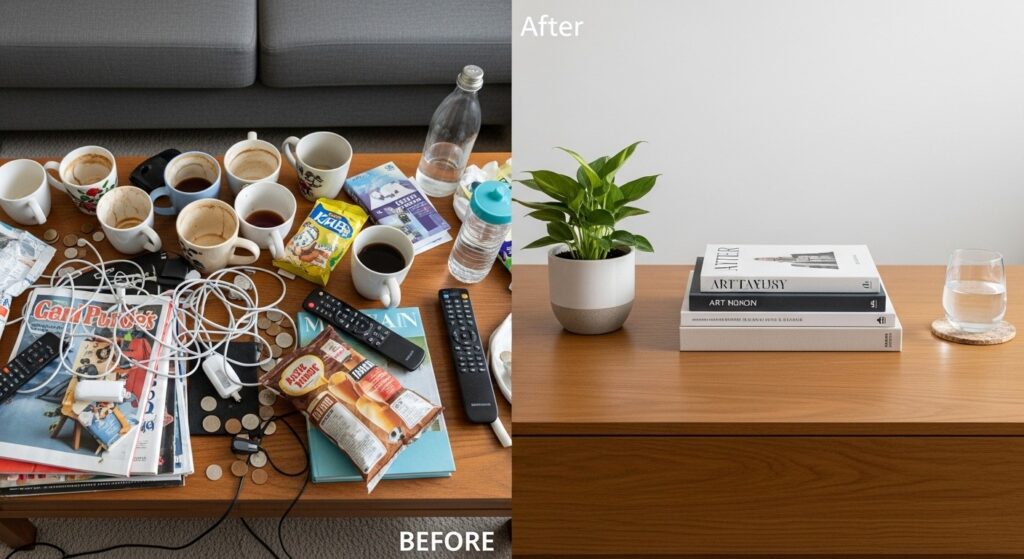
The single biggest shift you can make in your living room costs absolutely nothing. Stop adding things — and start taking them away. Most rooms don’t feel cluttered because they’re small. They feel cluttered because every surface is competing for attention at the same time.
When you approach DIY living room decor with a “less is more” mindset, each piece you do keep gets room to breathe. One well-made macramé wall hanging lands ten times harder than a gallery wall stuffed with mismatched frames from three different eras of your taste.
Give yourself permission to leave some space empty. Seriously. Negative space isn’t wasted space — it’s the quiet background that lets your best pieces do the talking.
Here’s where to start:
- Clear one surface completely and only put back the things you genuinely love
- Stick to three items maximum on any shelf or tabletop
- Group similar objects so they read as one intentional arrangement, not a pile
2. Choosing a Focal Point
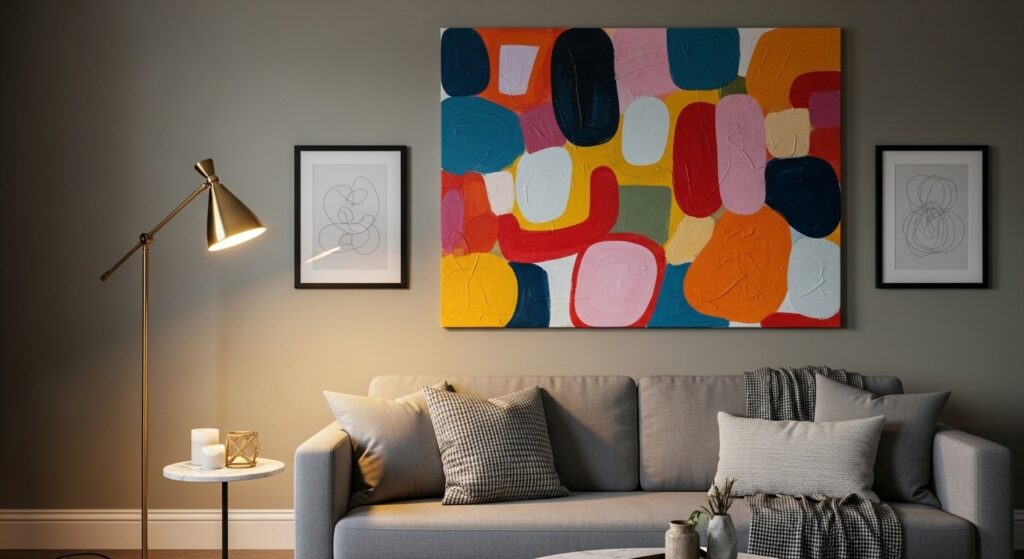
Every room needs a starring moment — one spot your eyes land on first and want to stay. In most living rooms, that’s the wall behind the sofa, a fireplace, or the biggest window. Figuring out yours is the first real step in any good decorating project.
Once you’ve identified it, build toward it. A DIY gallery arrangement, a large painting on kraft paper, or a collection of woven baskets hung in a deliberate pattern can all become that anchoring focal moment. What matters most isn’t matching — it’s keeping things cohesive. Think consistent color or theme, not identical pieces.
No natural focal point? Create one. Paint one wall a slightly richer version of your existing palette. Or hang a large piece of DIY wall art at eye level and let it take center stage. It’s one of the fastest changes you can make, and the impact is immediate.
- Your focal wall should be the first thing a person sees when they walk into the room
- Keep the surrounding walls quieter so your focal point actually leads
- Lighting draws the eye — a floor lamp or wall sconce can spotlight your key area nicely
3. Scale and Proportion Basics
This is where most beginners stumble, and it’s such a fixable problem. A tiny rug under a big sofa, or a small piece of art floating in the middle of a large wall — these proportion mistakes make even beautiful rooms feel off. And the good news? Getting scale right is free.
For homemade living room decor, this matters most when you’re sizing a piece of DIY art or building out a shelf display. A canvas that fills two-thirds of the wall above your sofa will always look more intentional than a little frame sitting in a sea of empty space. When in doubt, go bigger than you think you should.
A simple trick: lay newspaper on the floor or tape an outline on the wall to mock up the size before you commit to anything. It takes five minutes and saves hours of second-guessing.
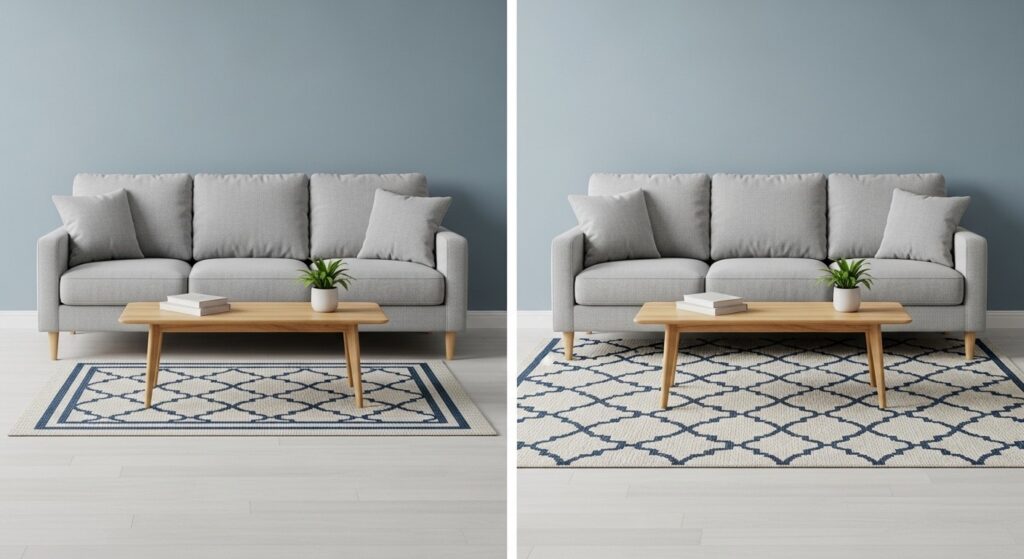
- Rugs should extend at least 6–8 inches beyond the sofa on either side
- Wall art looks best when it covers 60–75% of the wall it hangs on
- Vary heights in shelf displays: tall, medium, and low objects together feel intentionally balanced
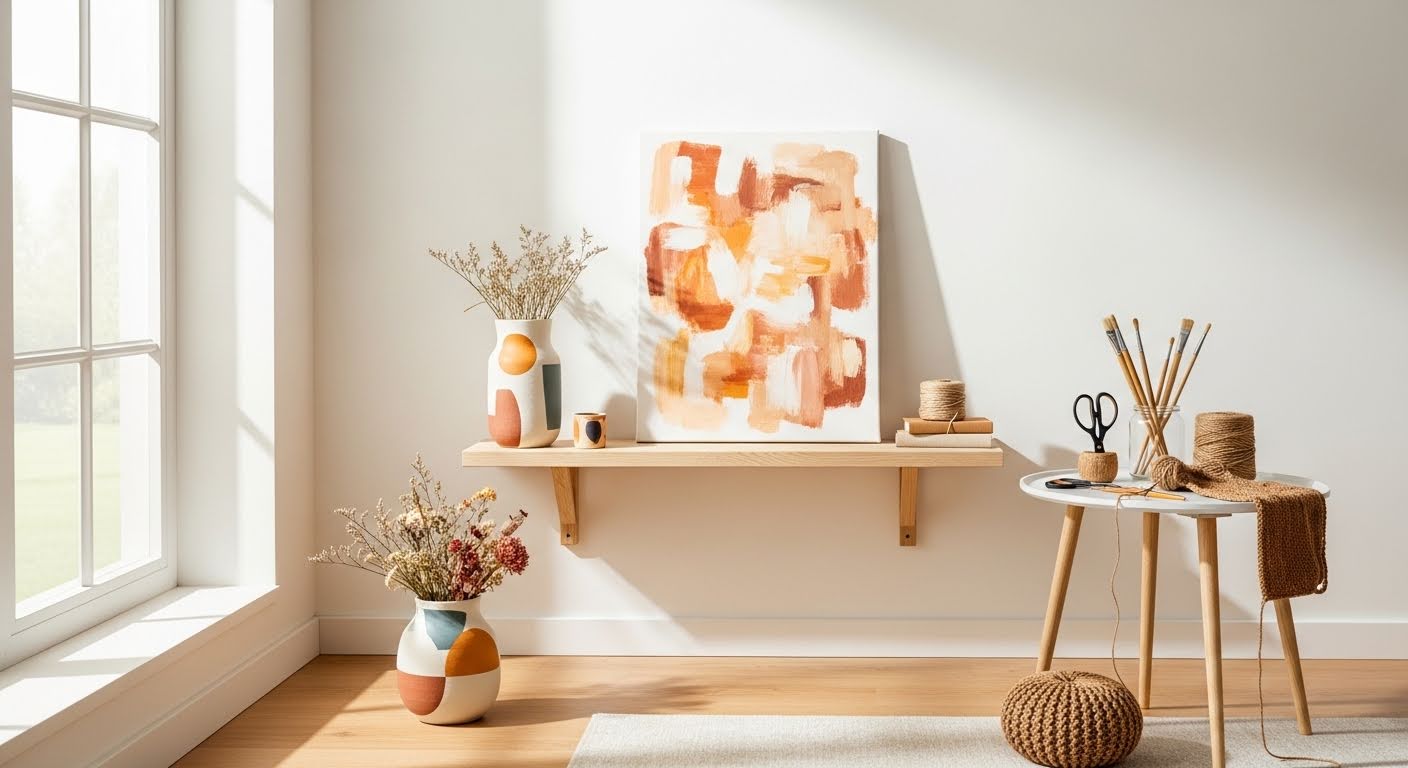
4. Mixing Textures Effectively
Texture is the quiet ingredient that makes a room feel rich without costing much. A linen throw draped over the arm of a sofa, a jute basket tucked under a side table, a chunky knit pillow propped against a cushion — none of these are expensive, but layered together they create a warmth you actually feel when you walk in.
For DIY projects, texture is genuinely your best tool. You can make your own macramé plant hanger, braid a cord bowl, or sew a simple linen pillowcase in an afternoon. These kinds of handmade pieces add something you honestly can’t buy cheaply in a store — that slightly imperfect, personal quality that makes a room feel lived-in and real.
A good rule of thumb: mix at least three different textures in any one seating area. Think smooth (a ceramic vase), soft (a knit throw), and natural (a wooden tray). That combination hits every sense and makes the space feel curated without looking like you tried too hard.
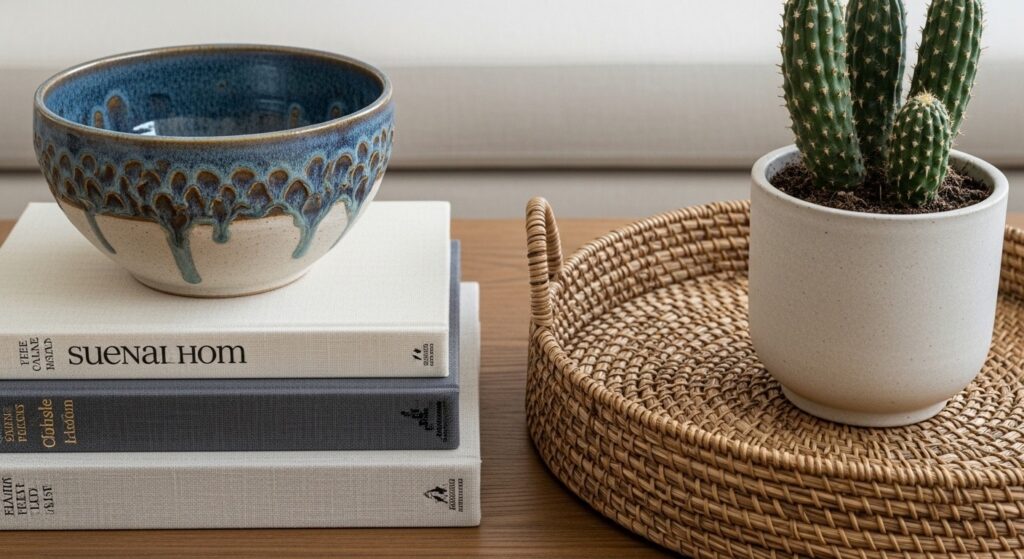
- Always include at least one natural material — wood, rattan, or jute — in every vignette
- Chunky knit or bouclé fabric adds instant coziness to bare sofa cushions
- Even DIY wall art can incorporate texture — think canvas weaving or layered paper techniques
5. Color Coordination Tips
You don’t have to repaint your walls to bring color into a room. For renters or small-space dwellers especially, pillow covers, throws, and handmade artwork are the smartest and most flexible way to introduce a color story without committing to anything permanent.
Pick three colors and repeat them. One dominant neutral (your walls and sofa), one mid-tone (maybe a warm terracotta, sage green, or dusty blue), and one deeper accent. When you’re making your own decor projects — painting on canvas, dyeing fabric, crafting paper vases — pull from this same palette. Consistency is what makes a room look intentional, not expensive.
You don’t need every piece to match. You need every piece to feel like it belongs to the same story. That’s a very different thing, and it’s much easier to pull off than people think.
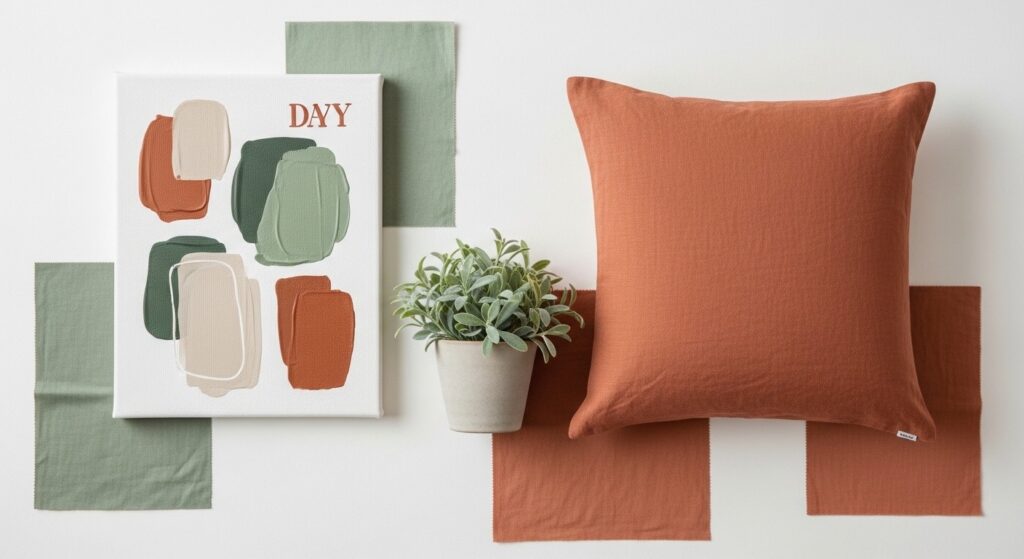
- Build your palette around what’s already in the room, not what you wish was there
- Repeat each color at least twice — once at eye level, once lower down
- Warm neutrals like cream, oat, and sand work well in almost any apartment lighting
6. Personal Touches That Work
This is the part that actually makes your living room yours. Not a showroom, not a replica of someone’s feed. A space that tells your story. The most memorable rooms always have something personal in them, and visitors always notice it — even if they can’t quite say why.
Your DIY projects are the perfect vehicle for this. Frame a sketch you drew on a quiet afternoon. Display a small collection of objects from places you’ve been. Make a simple print using pressed flowers or everyday household objects. These aren’t just decorations — they’re things people ask about, and that kind of warmth can’t be manufactured.
Personal touches also don’t have to look precious. A hand-lettered quote on butcher paper in a plain frame can land just as well as a print you paid for — more so, actually, because it means something specific to you.
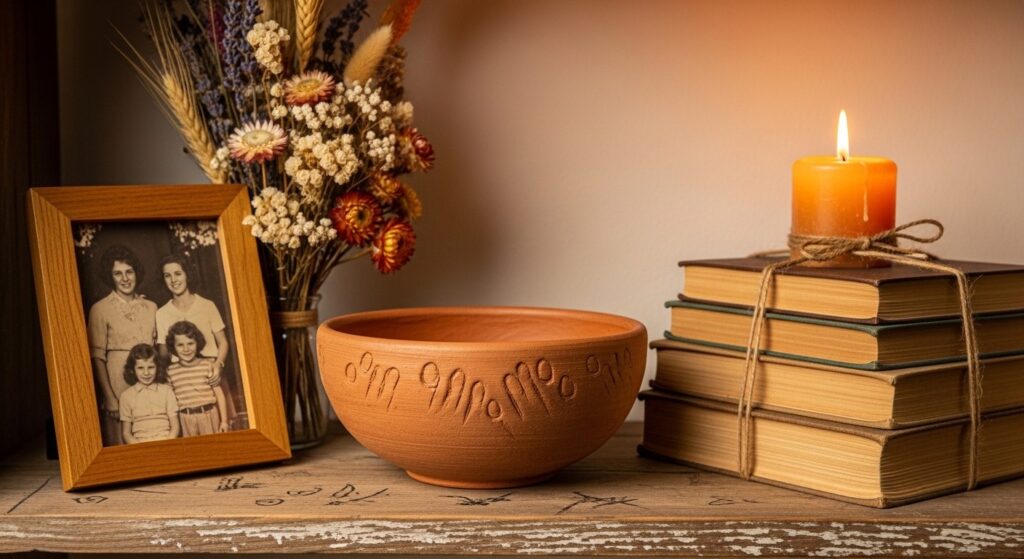
- Group personal objects in odd numbers (3 or 5) for the most natural-looking arrangements
- Mix old and new — a vintage find next to something you just made creates genuine visual interest
- Don’t hide your handmade projects. Give them a spot where they’ll be seen, and own them
7. What to Edit Out
Knowing what to remove is just as important as knowing what to add. A beautiful room is often the result of editing decisions made before a single new thing was brought in. Before you start any new project, walk through your living room and take a photo from the doorway — the way a guest would see it for the first time. That image tells the truth.
Common culprits: too many throw pillows in competing patterns, mismatched storage containers piled in corners, and duplicates of the same item on every surface. Each of these steals visual energy from the things you actually want people to notice. When everything is a focal point, nothing is.
Try this: do one editing pass before you add anything new. Spend 30 minutes pulling items you’re unsure about, and live with the edited version for a few days. You’ll quickly discover what you actually miss — and what you don’t. That clarity is worth more than any shopping trip.
- Remove anything you’ve stopped noticing — if it’s invisible to you, it’s not earning its place
- Tidy cables and cords first; they undermine even the most beautifully styled room
- Clear surfaces of duplicates — one plant, not five; one candle, not seven
- Be honest about furniture that’s out of proportion and consider whether it’s helping the space
8. Common Mistakes to Avoid
Even the most enthusiastic decorators hit these same walls. Knowing what’s coming means you can sidestep it before it costs you time, effort, or money.
- Not measuring first. Before you build, buy, or hang anything — measure. A rug that’s slightly too small, wall art that’s the wrong size for the wall, or a shelf that won’t clear the light switch will undo good intentions fast. A measuring tape and a bit of painter’s tape for mocking up placements are genuinely the most useful tools you have.
- Ignoring what’s already there. Your sofa, your flooring, your curtains — they already set the tone. Any new homemade decor you add needs to respond to those existing pieces, not compete with them. Start by identifying the undertones in what you already own, then build around them.
- Chasing trends over personal style. By the time a trend reaches every home decor blog at once, it’s already on its way out. Build a room around what genuinely makes you happy when you walk into it. Your personal style will outlast any trend cycle.
- Skipping the planning phase. Even for small projects, sketch something out first. A rough floor plan on graph paper or a photo with a few penciled notes saves hours of rearranging furniture or repainting a wall that didn’t work the way you imagined.
For more ideas on a smaller budget, check out Budget Living Room Ideas, browse Wall Decor Ideas for your next project, or dive into our full Budget Living Room Makeover guide.
Frequently Asked Questions
Q1: What’s the most important element to focus on first?
Start with your focal wall — the most prominent surface in the room, usually the one behind the sofa. It’s the anchor of the whole design, and once that’s right, every other decision falls into place around it more easily.
For most beginners, the best move is to create or hang one strong piece of DIY wall art on that wall. It doesn’t have to be complex. A large abstract canvas in your palette can change a room in a single afternoon.
Getting your focal point right gives you a clear direction for everything else: furniture arrangement, lighting, and how you style your surfaces. Think of it as the foundation, not the finishing touch.
Q2: How do I actually start?
Start by editing, not adding. Walk through your living room and take a photo from the doorway — the way a first-time guest sees it. That image will show you what’s fighting for attention and what’s missing.
Then pick one area and focus there first. Don’t try to tackle the whole room in a weekend. A single well-styled corner — sofa, side table, lamp, one plant — gives you momentum and teaches you what works before you scale up.
From there, plan one DIY project at a time. A painted canvas, a simple woven hanger, a styled shelf. Each one teaches you something about your space that no amount of scrolling inspiration boards ever will.
Q3: What’s a realistic budget?
The beauty of DIY living room decor is that you set the budget. A single project — a painted canvas, a woven wall hanging, a set of handmade clay pinch pots — can cost as little as five to fifteen dollars in materials.
For a broader refresh using DIY methods, most beginners spend somewhere between $50 and $150 spread across several weekends. That usually covers basic craft supplies, a plant or two, and a few accent pieces like new pillow covers or frames.
The bigger investment is time. An afternoon of editing and rearranging what you already own — completely free — often makes a more dramatic difference than buying new things. Start there, and your budget stretches further than you’d expect.
Q4: How long does this take?
A full living room refresh done properly over multiple DIY weekends realistically takes three to six weeks. Trying to do everything in one go tends to lead to decisions you regret. Pacing yourself produces better rooms.
Individual projects are much faster. A painted canvas takes one afternoon including dry time. A macramé wall hanging takes a full weekend for a first-timer. A gallery wall can come together in a Saturday morning once you’ve gathered your pieces.
Give yourself a week to live with each change before moving to the next one. Your eye adjusts, and you’ll often find you love or dislike something more than you initially thought. That breathing room prevents a lot of redoing things.
Q5: What mistakes should I watch out for most?
The four biggest ones are: skipping measurements, ignoring what’s already in the room, chasing trends instead of building around your own taste, and jumping in without any kind of plan. Any one of these can derail a project that started with great intentions.
Beyond those four, the mistake that wastes the most time is buying supplies before you have a clear direction. It’s tempting to stock up on craft materials when you’re feeling inspired, but without a vision you’ll end up with half-finished projects and a growing storage problem.
And finally: don’t aim for perfection. The handmade quality of DIY decor is exactly what makes it special. A slightly uneven brushstroke or an imperfectly knotted hanger adds character, not flaws. Let yourself learn as you go — the room will be better for it.
Ready to Make It Yours?
Your living room doesn’t need a big budget or a professional to come in and sort it out. It needs your attention, a bit of patience, and the willingness to try something with your own hands. The ideas in this guide — editing ruthlessly, building around a focal point, mixing textures, staying true to what you actually like — work whether you’re in a studio apartment or a larger open-plan space. Start with one corner. Make one project. Step back and see what it tells you about the rest of the room.
Every beautiful space started with a single decision. Yours can start today. Trust the process, and remember: a room made with intention and care will always feel more like home than anything you bought off a shelf.
| Want to go further?Read our complete Budget Living Room Makeover guide for a step-by-step walkthrough of transforming a full room without the stress — or the big price tag. |