Blank Wall Solutions for Living Room: Fill Empty Spaces
You set up the sofa, found the right spot for the coffee table, maybe wrestled a bookshelf into position — and then you stopped. There it was: a big, blank wall staring back at you. If you’ve ever stood in your living room with no idea what to actually put on that wall, you’re in very good company. Figuring out what to do with a blank wall in a living room trips up a lot of people, even those who are otherwise pretty handy with a home refresh.
The good news? You really don’t need much. No design background, no enormous budget, no perfectly curated taste. Whether you’re working with a tiny apartment wall or something bigger, there are practical empty wall ideas that work at almost any scale. It just takes a little direction — and that’s exactly what this guide gives you.
Below, you’ll find six approachable solutions, from large wall decor options to cozy shelf arrangements. There’s also a quick rundown of the mistakes worth skipping and answers to the questions people ask most before starting a project like this. By the time you get to the end, you’ll have a clear idea of what to put on that blank wall — and how to make it look like you planned it all along.
Quick Summary
WHO THIS IS FOR
Home decor beginnersAnyone refreshing their living room
TIME TO READ
5 min
TOP 3 TAKAWAYS
1. Assessing Your Blank Wall Space
Before you touch a nail, grab a tape measure. The most useful thing you can know is how wide the furniture below your wall actually is — your sofa, console table, or sideboard. Whatever you eventually hang or display should cover roughly two-thirds to three-quarters of that width. It’s a simple guideline, but it prevents the number one mistake beginners make.
Think about light, too. If your wall sits in a darker corner of the room, lighter tones and reflective surfaces (like mirrors or glass-fronted frames) will help it feel brighter without any rewiring. Walls that get plenty of sun have more flexibility — you can go darker or bolder without things feeling heavy.
One more question before you dive in: does this wall need to do any work, or is it purely decorative? If you’re short on storage, shelves might serve you better than a large print. Knowing that up front saves a lot of back-and-forth later.
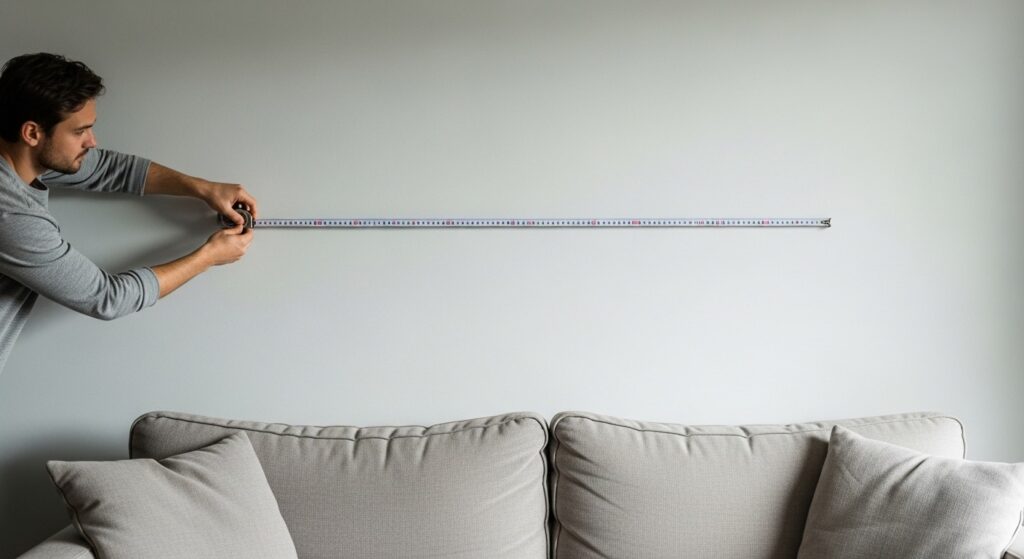
- Measure furniture width — your wall display should span two-thirds to three-quarters of it
- Check how much natural light the wall gets throughout the day
- Decide early: purely decorative, or do you need storage too?
- Note any outlets, vents, or other fixed features to plan around
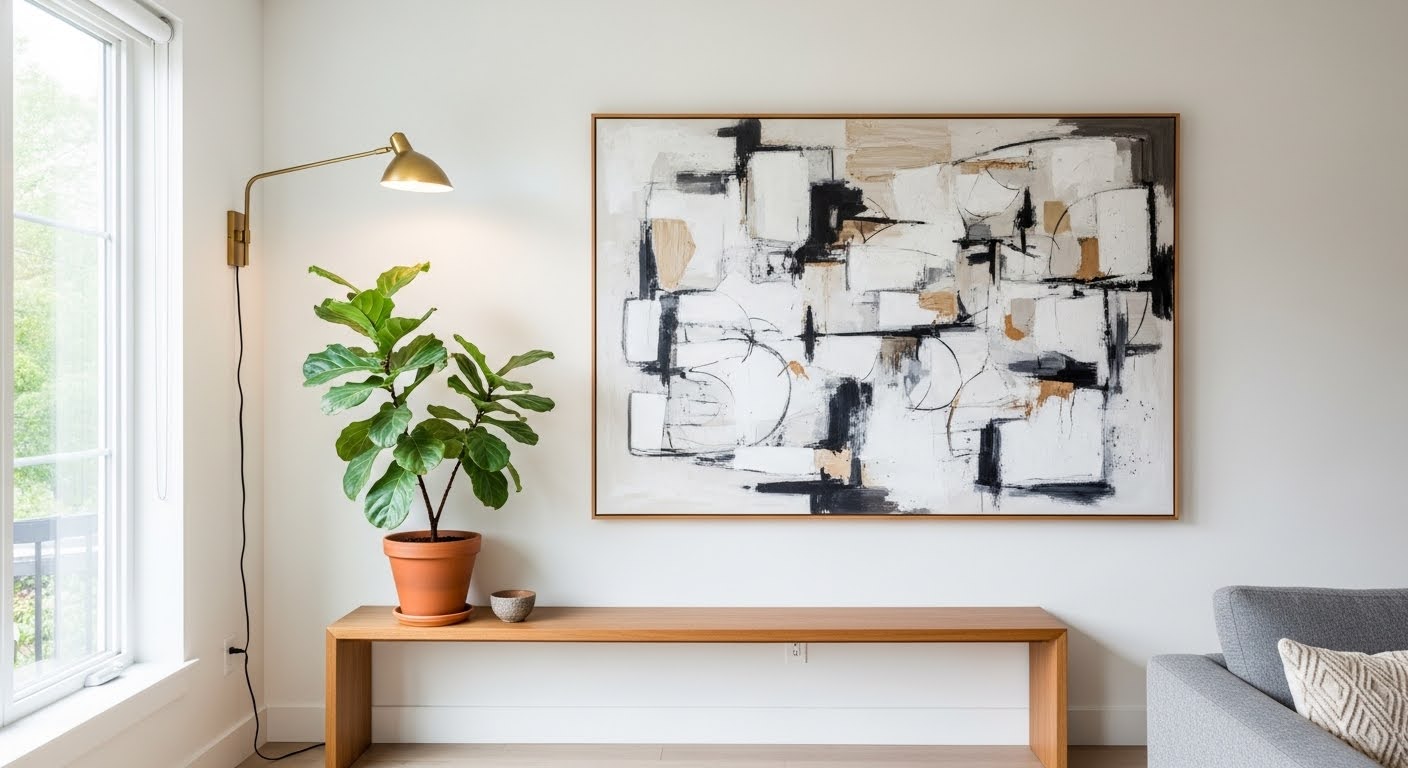
2. Large-Scale Art Options
One big piece of art is often the simplest, cleanest answer for an empty wall. Done right, it looks confident and deliberate — no complicated arrangement required. The catch is that the piece genuinely needs to be large. A print that’s too small for the space will just look like you forgot to finish. For a standard three-seat sofa, something at least 24 inches tall is usually where you want to start.
You don’t have to spend a lot. Big prints from independent artists, oversized posters in plain frames, and unframed canvases all hold up well. If you want something that feels more personal, commissioning a local artist or even painting something abstract yourself is a lot more doable than people expect.
Large black-and-white photography is worth a mention here. A single dramatic image — a landscape, a cityscape, something architectural — can anchor a whole room quietly, without competing with your furniture or existing colors. For more ideas across different styles, our guide to Wall Decor Ideas has plenty to work with.
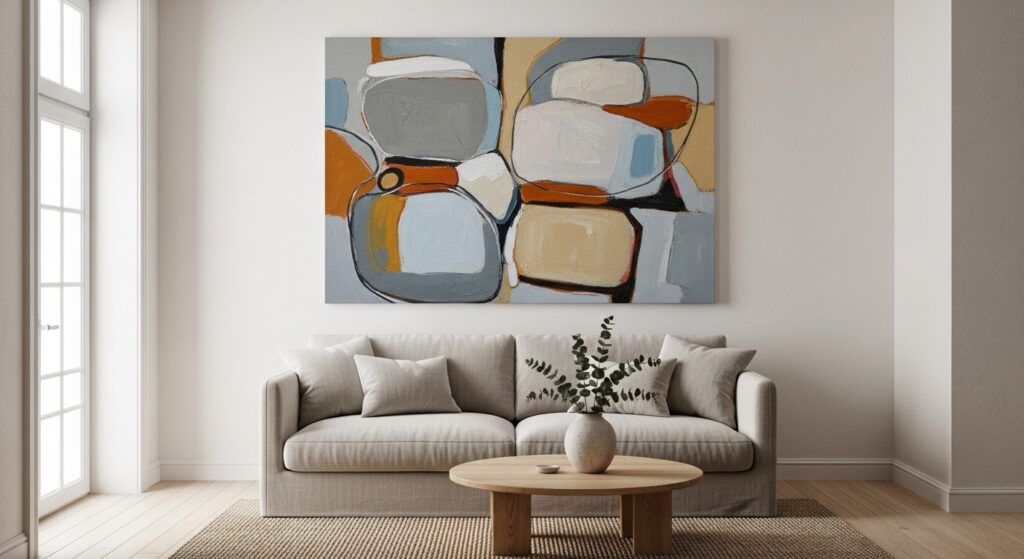
- Aim for art that covers at least two-thirds of the furniture width below it
- Black-and-white photography pairs well with almost any color palette
- Unframed canvases feel relaxed and modern — no frame budget needed
- When in doubt between two sizes, go with the larger one
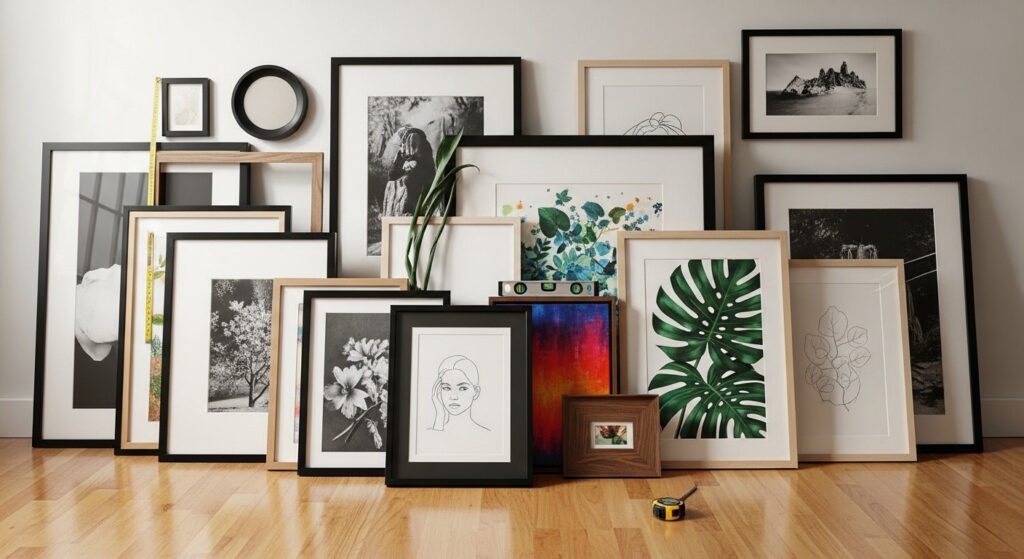
3. Gallery Wall Solutions
A gallery wall is basically a curated collection on your wall — and it doesn’t need to be perfectly symmetrical or matchy-matchy to work. The trick is deciding on one unifying element before you start. That might be a consistent frame color, a shared subject (botanicals, architecture, travel), or even just a limited color palette across all the prints. That one decision is what makes the whole thing feel cohesive rather than accidental.
Lay everything out on the floor first. Really. Don’t skip this step. Move pieces around, try different groupings, and live with it for a day before anything goes on the wall. Most people find an asymmetrical arrangement — one larger anchor piece with smaller ones spreading out around it — sits most naturally.
You can mix framed prints, unframed photos, small mirrors, and even lightweight three-dimensional items like small woven pieces or botanicals under glass. The more the collection reflects things you actually care about, the better it tends to look. Our Gallery Wall Ideas guide walks through the full process in detail if you want to go deeper.
- Choose one unifying element — frame color, theme, or palette — before you start
- Plan the layout on the floor; don’t wing it directly on the wall
- Leave about 2 to 3 inches of breathing room between each frame
- Mix sizes: one larger anchor piece with medium and small pieces around it
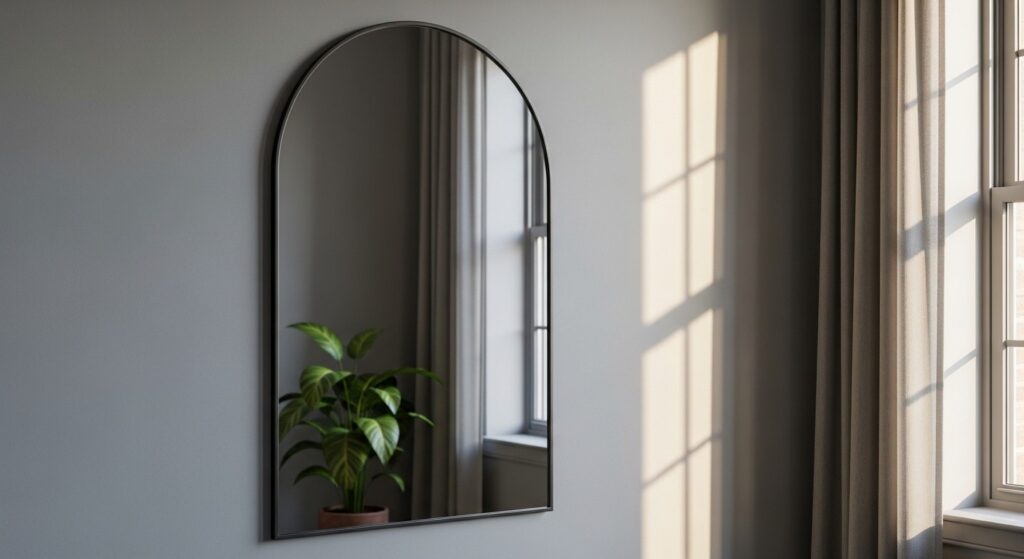
4. Mirror Arrangements
Mirrors are genuinely one of the best tools for a small living room. A well-placed mirror bounces light around, makes the room read as bigger, and adds visual depth — all without adding visual clutter. One large round or arched mirror above a sofa or console table can do more for a room than almost anything else at a similar price point.
If a single mirror feels a bit plain to you, try a cluster of three in different shapes but with a matching finish — matte black, natural wood, antique brass, whatever fits the room. Put the largest one in the center and let the smaller ones sit slightly to the sides. It has more energy than one piece alone, without being overwhelming.
One thing people forget: mirrors show you whatever is across from them. Before you commit to a spot, stand where the mirror will hang and look at the reflection. Make sure it’s picking up window light or a nice part of the room — not a cluttered corner or a plain door.
- Round mirrors soften rooms that have a lot of straight edges and hard angles
- Always check what the mirror will reflect before you commit to a position
- A cluster of three in matching finishes adds energy without looking chaotic
- Leaning a large mirror against the wall works great and requires zero holes
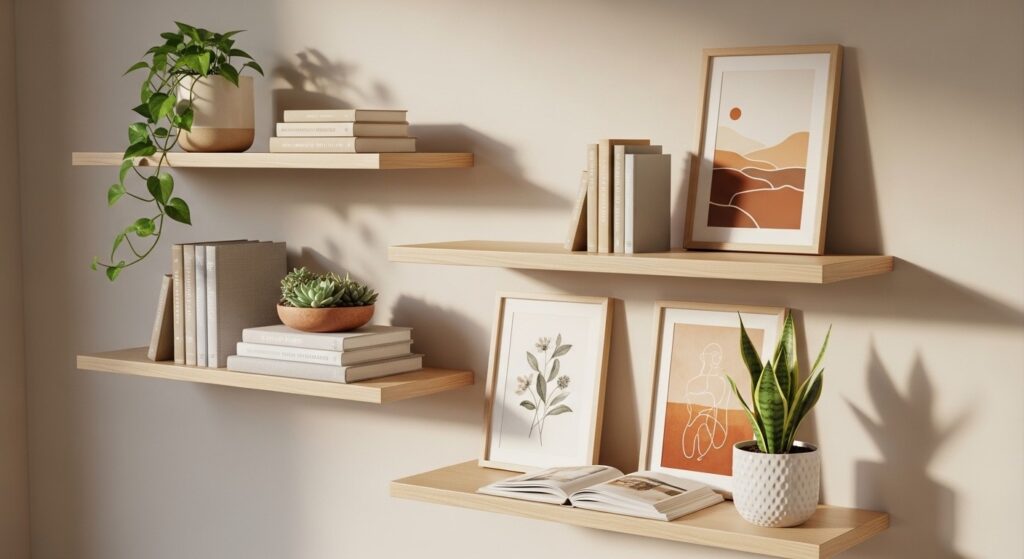
5. Shelf and Ledge Ideas
Floating shelves are a two-for-one: they fill the wall and give you display space at the same time. A few shelves staggered at different heights — rather than lined up in a flat row — creates a much more dynamic look. Use that space to display a mix of small plants, books, candles, and objects you actually like looking at.
Picture ledges don’t get nearly enough credit. These are the shallow, rail-style shelves where you can lean framed prints against the wall instead of nailing them in place. Swap things around whenever the mood strikes, rotate art seasonally, and adjust without starting from scratch. For anyone who hates committing to a fixed arrangement, a picture ledge is the answer.
When it comes to styling shelves, the rule of thirds is your friend: mix tall objects with medium ones (a plant, a small sculpture) and a few smaller pieces at varying heights. Leave some open space — crowded shelves feel like clutter, not decor. Our Living Room Shelf Decor guide breaks down the styling process in a lot more detail.
- Stagger shelf heights — a flat horizontal row loses visual rhythm
- Picture ledges let you change art freely without touching the wall again
- Mix tall, medium, and small objects on each shelf for variety
- Leave at least a third of each shelf empty so it reads as styled, not cluttered
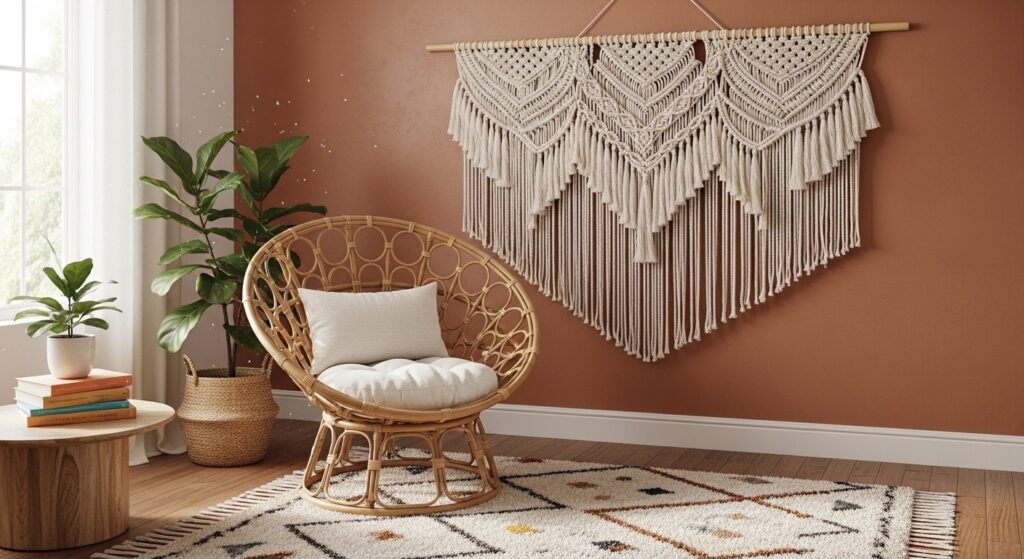
6. Textile Wall Hangings
There’s a warmth and softness to textiles that flat art just can’t match. A woven wall hanging, a tapestry, a vintage rug mounted horizontally — these bring texture and coziness into a room in a way that’s hard to replicate any other way. In apartments where surfaces feel hard and ceilings feel low, fabric on the walls makes a surprising difference.
The same size rules apply here: go big enough that the piece looks deliberate. A small weaving on a large wall looks like it drifted in from a different apartment. When you’re choosing between two sizes and you’re not sure, the larger one is almost always the right call.
Textiles are also very forgiving to install. Most hang from a simple dowel rod with a single nail. If you’re nervous about drilling or making permanent commitments, a textile piece is probably the most beginner-friendly wall project you can start with — easy to adjust, easy to swap out.
- Woven textiles add warmth and texture that paintings and prints can’t replicate
- Vintage rugs mounted horizontally make striking, affordable statement pieces
- Size up — a textile should fill at least half the visual area of the wall space
- Most hangings need only one nail, making installation very beginner-friendly
Common Mistakes to Avoid
Even a great idea can fall flat if you hit one of these. Worth knowing before you start:
| Hanging too high. The center of your art should sit at eye level — about 57 to 60 inches from the floor. Most people hang things too high, and it disconnects the art from the furniture below it. |
| Going too small for the space. A small print above a large sofa just looks like something is missing. Scale your pieces to the furniture below them, not to the wall by itself. Bigger is almost always better. |
| Unbalanced arrangements. Visual weight matters. If everything clusters to one side, the wall feels unfinished on the other. Step back, squint, and redistribute until both sides feel settled. |
| Ignoring the room’s style. A heavy rustic tapestry in a sleek modern room creates friction. Always ask whether a piece fits your space before asking whether you like it on its own. |
Frequently Asked Questions
What’s the most important element to focus on when decorating a blank wall?
Scale, without question. The right piece in the wrong size will always look off — no matter how much it costs or how much you love it. But a simple, inexpensive print that’s properly sized for the space? It can look really good. Before you think about style, color, or budget, measure your wall and the furniture below it. Use those numbers as your foundation, and let everything else follow from there.
How do I start without feeling overwhelmed?
Pick one solution from this guide and stick with it — just for now. Trying to weigh a gallery wall against floating shelves against a large mirror all at the same time is a recipe for doing nothing. Ask yourself one question first: does this wall need to do something practical, or is it only decorative? That alone will cut your options in half. Once you have a direction, find two or three photos that feel right for your space and use those as your guide. Focused beats thorough every time.
What does this kind of project typically cost?
More range than you might expect: anywhere from around $30 to $500 depending on what route you take. A single large print in a basic frame often lands between $50 and $150. A gallery wall of six to eight pieces can come together for under $200 if you mix new prints with things you already own. Floating shelves with hardware usually run $40 to $100. The main thing to remember is that spending more doesn’t automatically produce better results. A well-scaled $60 print will always look better than a pricier piece that’s the wrong size for the wall.
How long does this actually take from start to finish?
Think of it in two phases. The first phase — deciding what you want, measuring, browsing, ordering or shopping — usually takes one to two weeks if you do it at a relaxed pace and don’t rush the decision. The second phase, installation, is typically one to two hours once you have everything in hand. Gallery walls take a bit longer because of the floor-planning step, but most can go up in a single afternoon. The thing that saves the most time overall is planning your layout on paper or on the floor before you pick up a hammer. Fixing mistakes on the floor takes seconds. Fixing them on the wall takes a weekend.
You’re Ready to Fill That Wall
A blank wall isn’t a problem to solve — it’s a space to do something with. Whether you go with one oversized print, a layered gallery wall, a statement mirror, a set of shelves, or a cozy textile hanging, the approach is the same: start with measurements, pick a direction, and make one change at a time. You don’t have to figure out the entire room at once.
Come back here whenever you get stuck. Measure before you buy, think about scale first, and give yourself room to adjust as you go. You’ve got six solid options now — one of them is exactly right for your wall.
| Ready to go deeper?Our Wall Decor Ideas guide covers every style, room size, and budget.→ Read: Living Room Accent Wall |